There are various ways to deploy Docker images on AWS platforms, such as AWS EC2, AWS App Runner, AWS Lightsail, and AWS EKS. This article will explain the simplest method, which is deploying on AWS ECS.
Registering Docker Image in ECR
To use Docker images in AWS, you need to register the image in the Elastic Container Registry (ECR). For detailed instructions on image registration, refer to the official AWS document, which covers repository creation and Docker image push.
Upon completion, you will see a screen like this in your ECR repository:

From now on, use the value in the URI column to deploy the image.
Setting up AWS ECS
1. Creating a Cluster
To use AWS Elastic Container Service, you first need to create a cluster. Navigate to Clusters > Create Cluster in ECS, and you will see a screen like this:
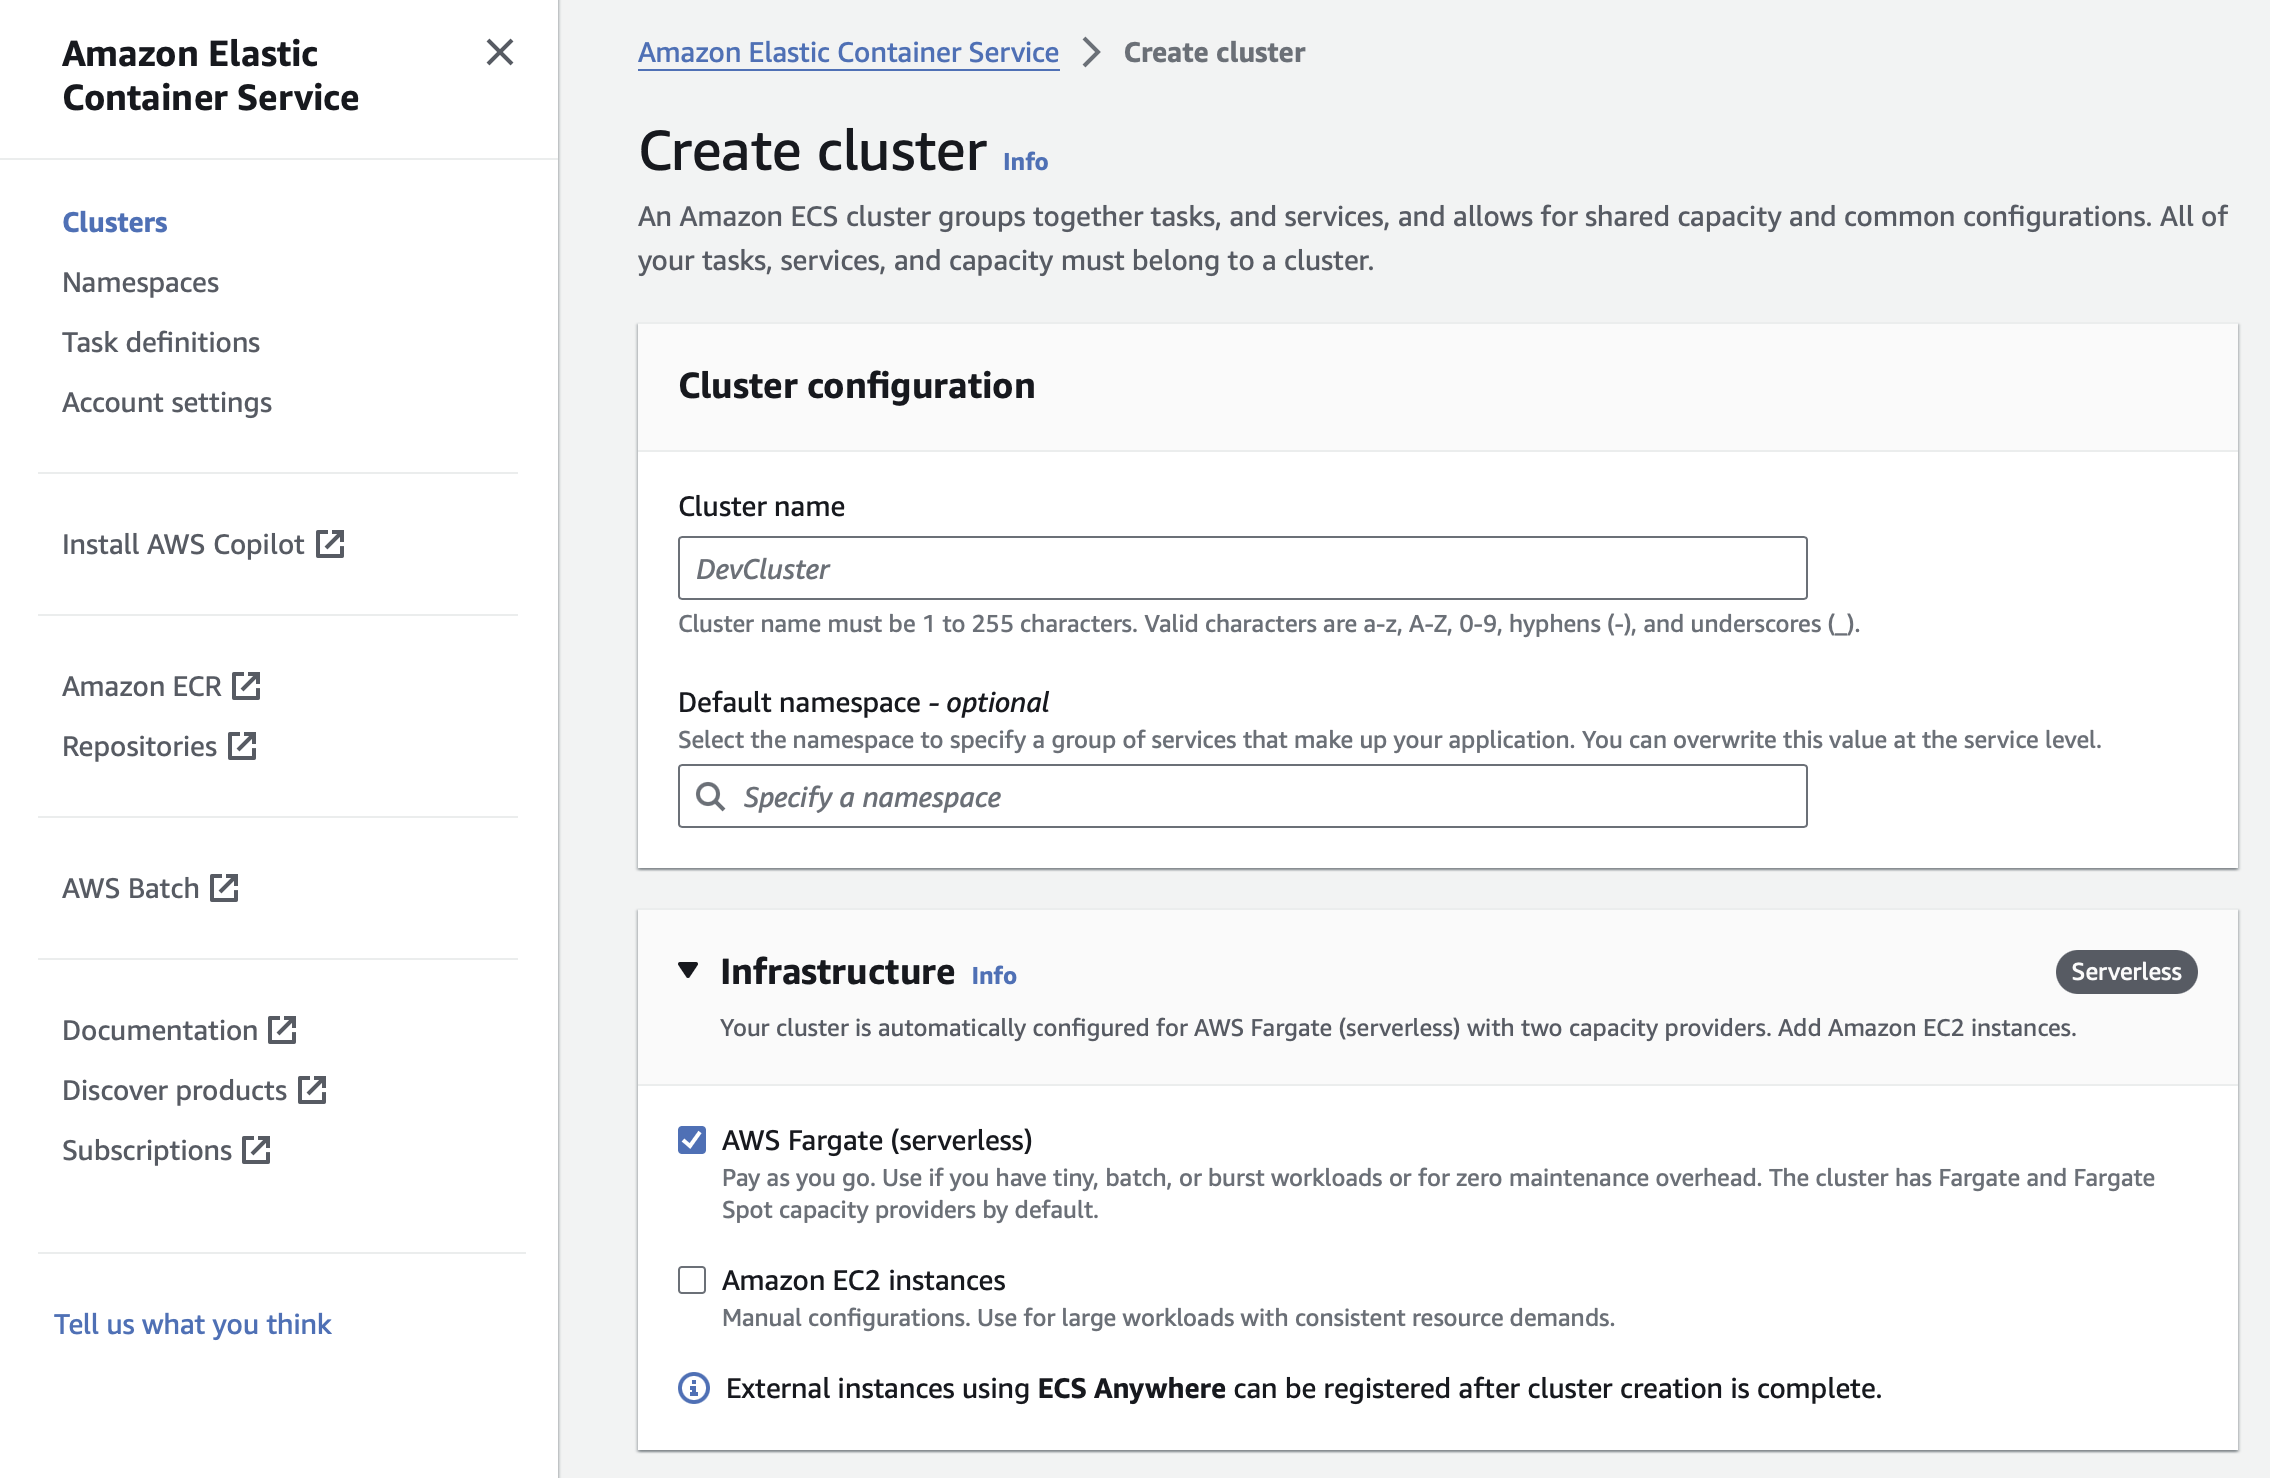
- Enter an appropriate name in
Cluster name. - Both
AWS FargateandEC2can be used forInfrastructure, but this guide will use the simplerAWS Fargate. - Create the cluster.
2. Defining a Task
To use the image, you need to define a task. Navigate to Task definition > Create new task definition in ECS.
- Task definition configuration
- Enter an appropriate task name.
- Infrastructure requirements
- Select
AWS FargateforLaunch type. - Select
Linux/X86_64forOperating system/Architecture. - A task size of 8 vCPUs and 16GB of memory is recommended.
- Select
- Container
- Enter an appropriate container name and the image URI registered in ECR.
- Open the following ports:
- TCP port
8000- A2 Campaign Management System UI
- TCP port
- Allocate all resources to the single container included in the task.
- Enable the
Use log collectionoption underLogging.
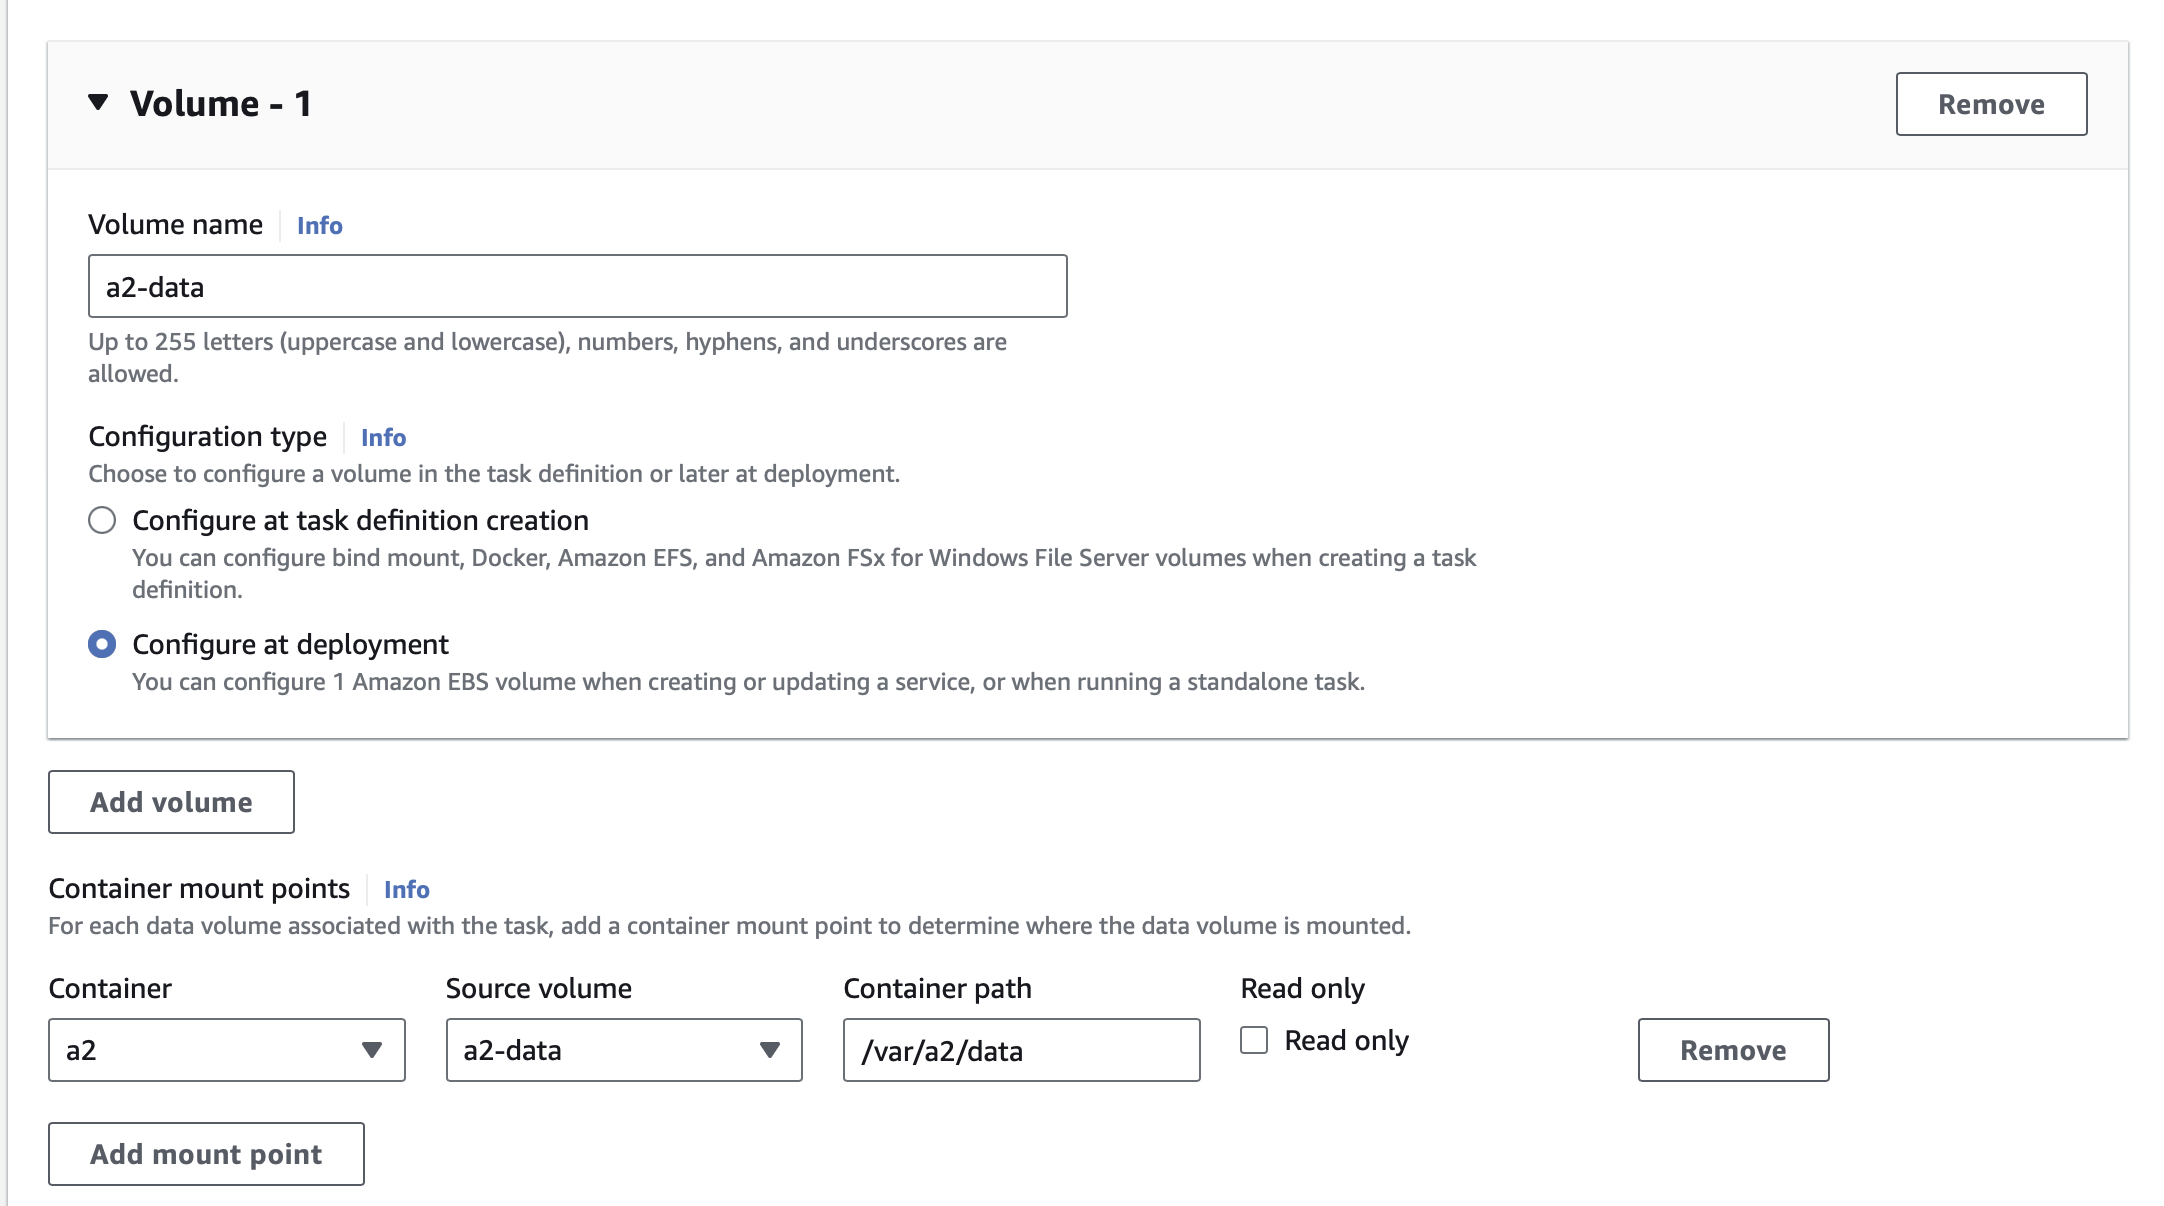
- Volume
- A2’s data is stored at /var/a2/data, so define appropriate storage size and mount it to the /var/a2/data path to retain container data. • For retaining data, specify
Configuration TypeasConfigure at deploymentusing AWS EBS. • Refer to the images below for detailed settings.
- A2’s data is stored at /var/a2/data, so define appropriate storage size and mount it to the /var/a2/data path to retain container data. • For retaining data, specify
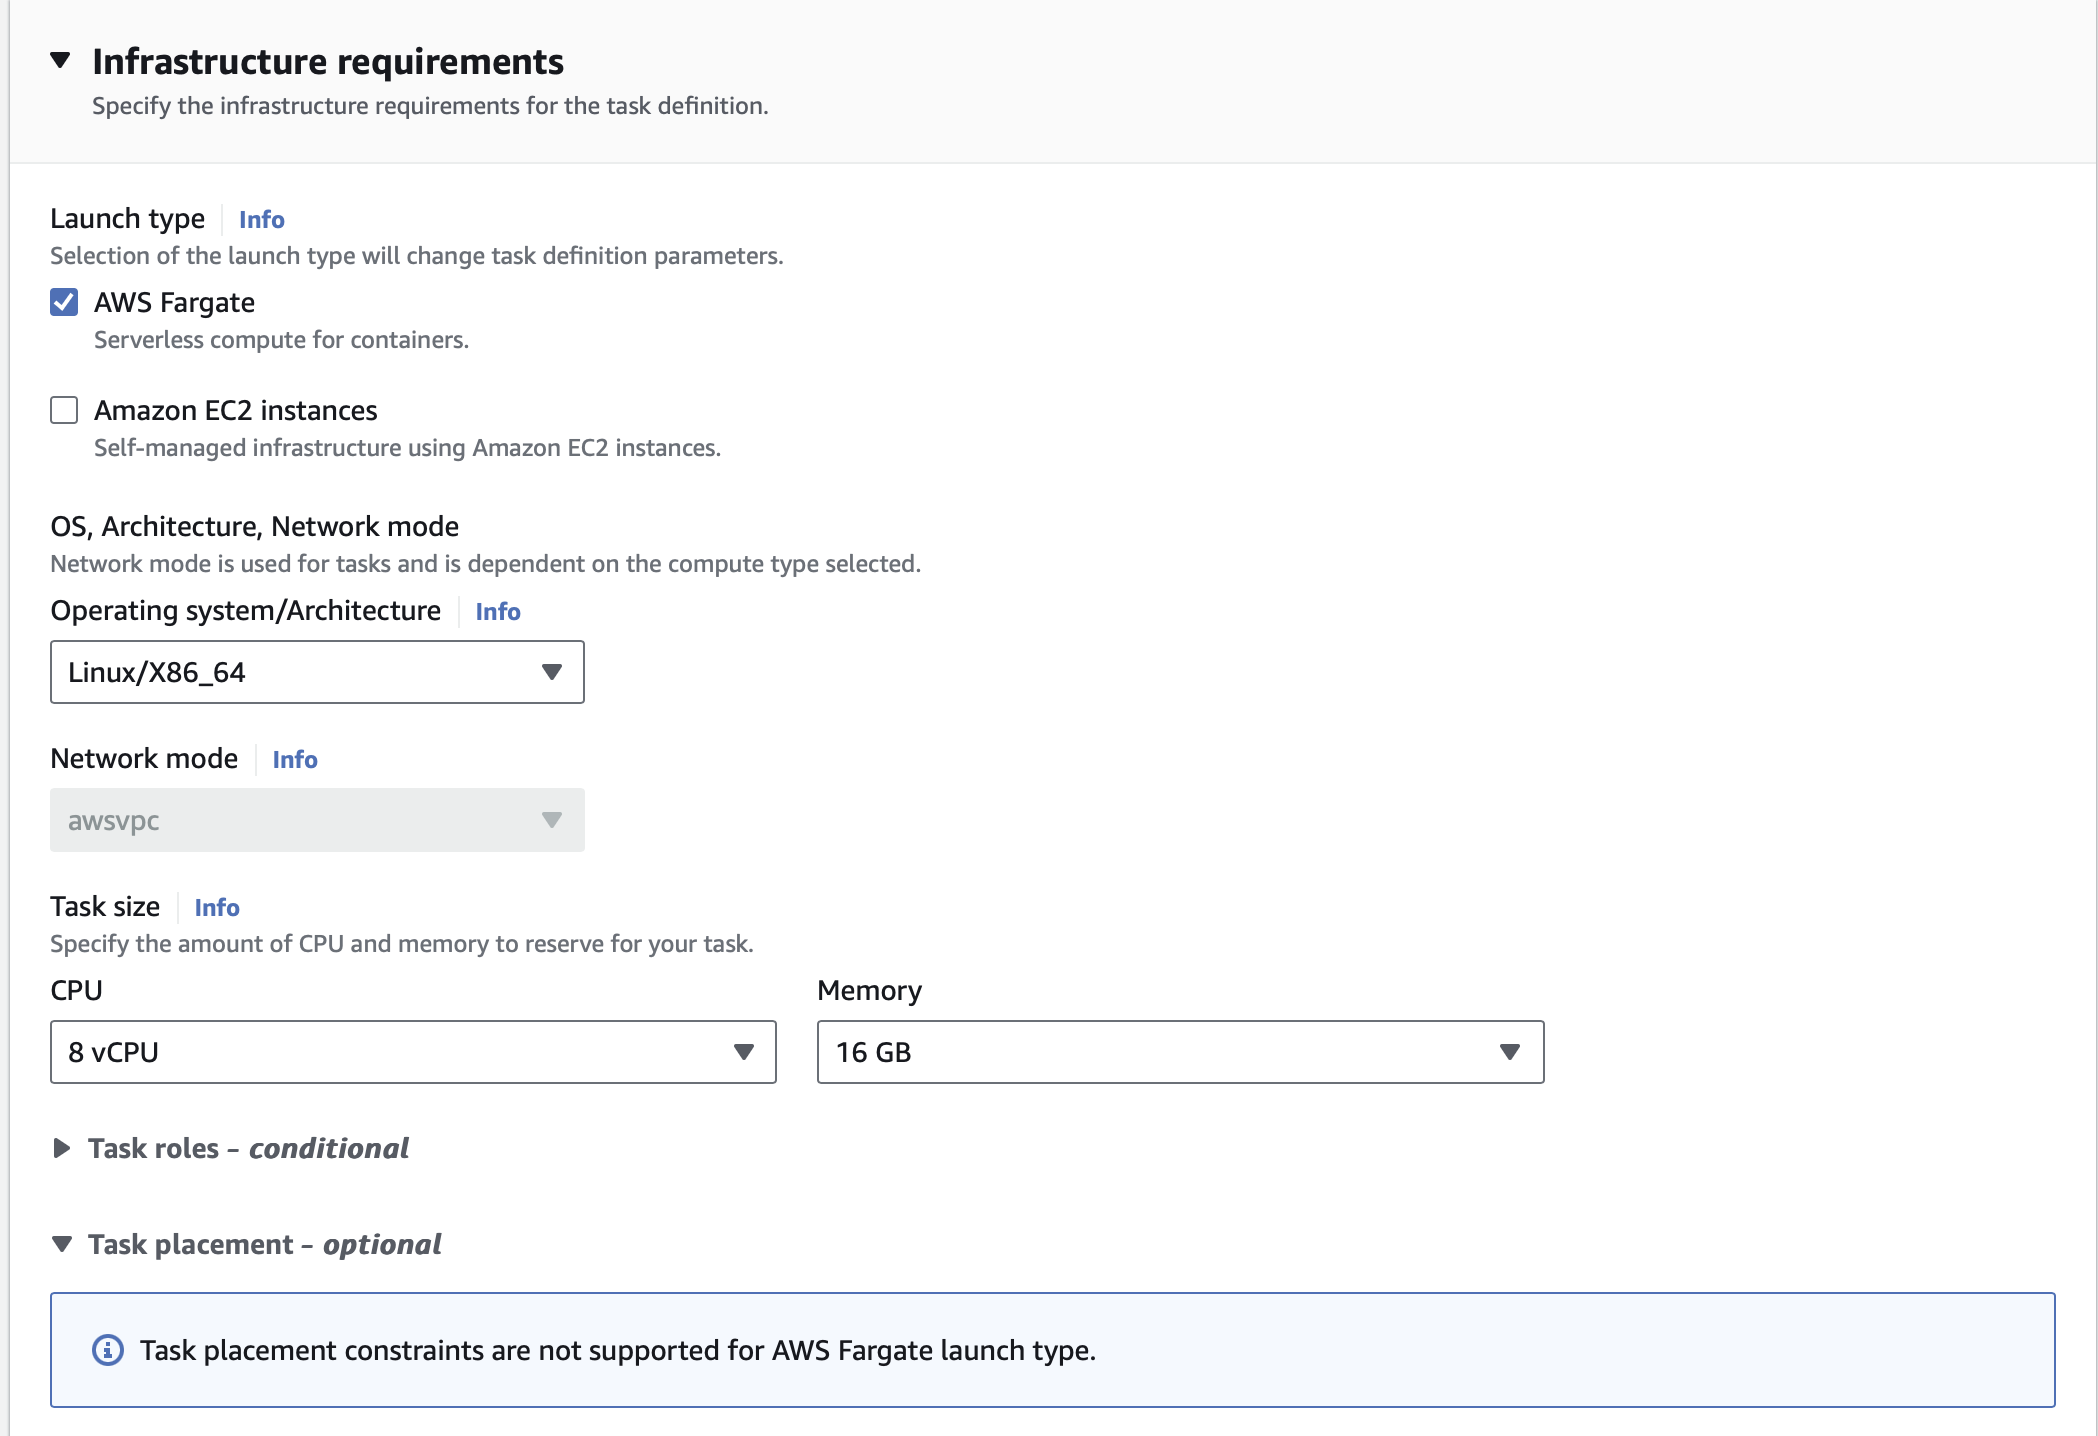
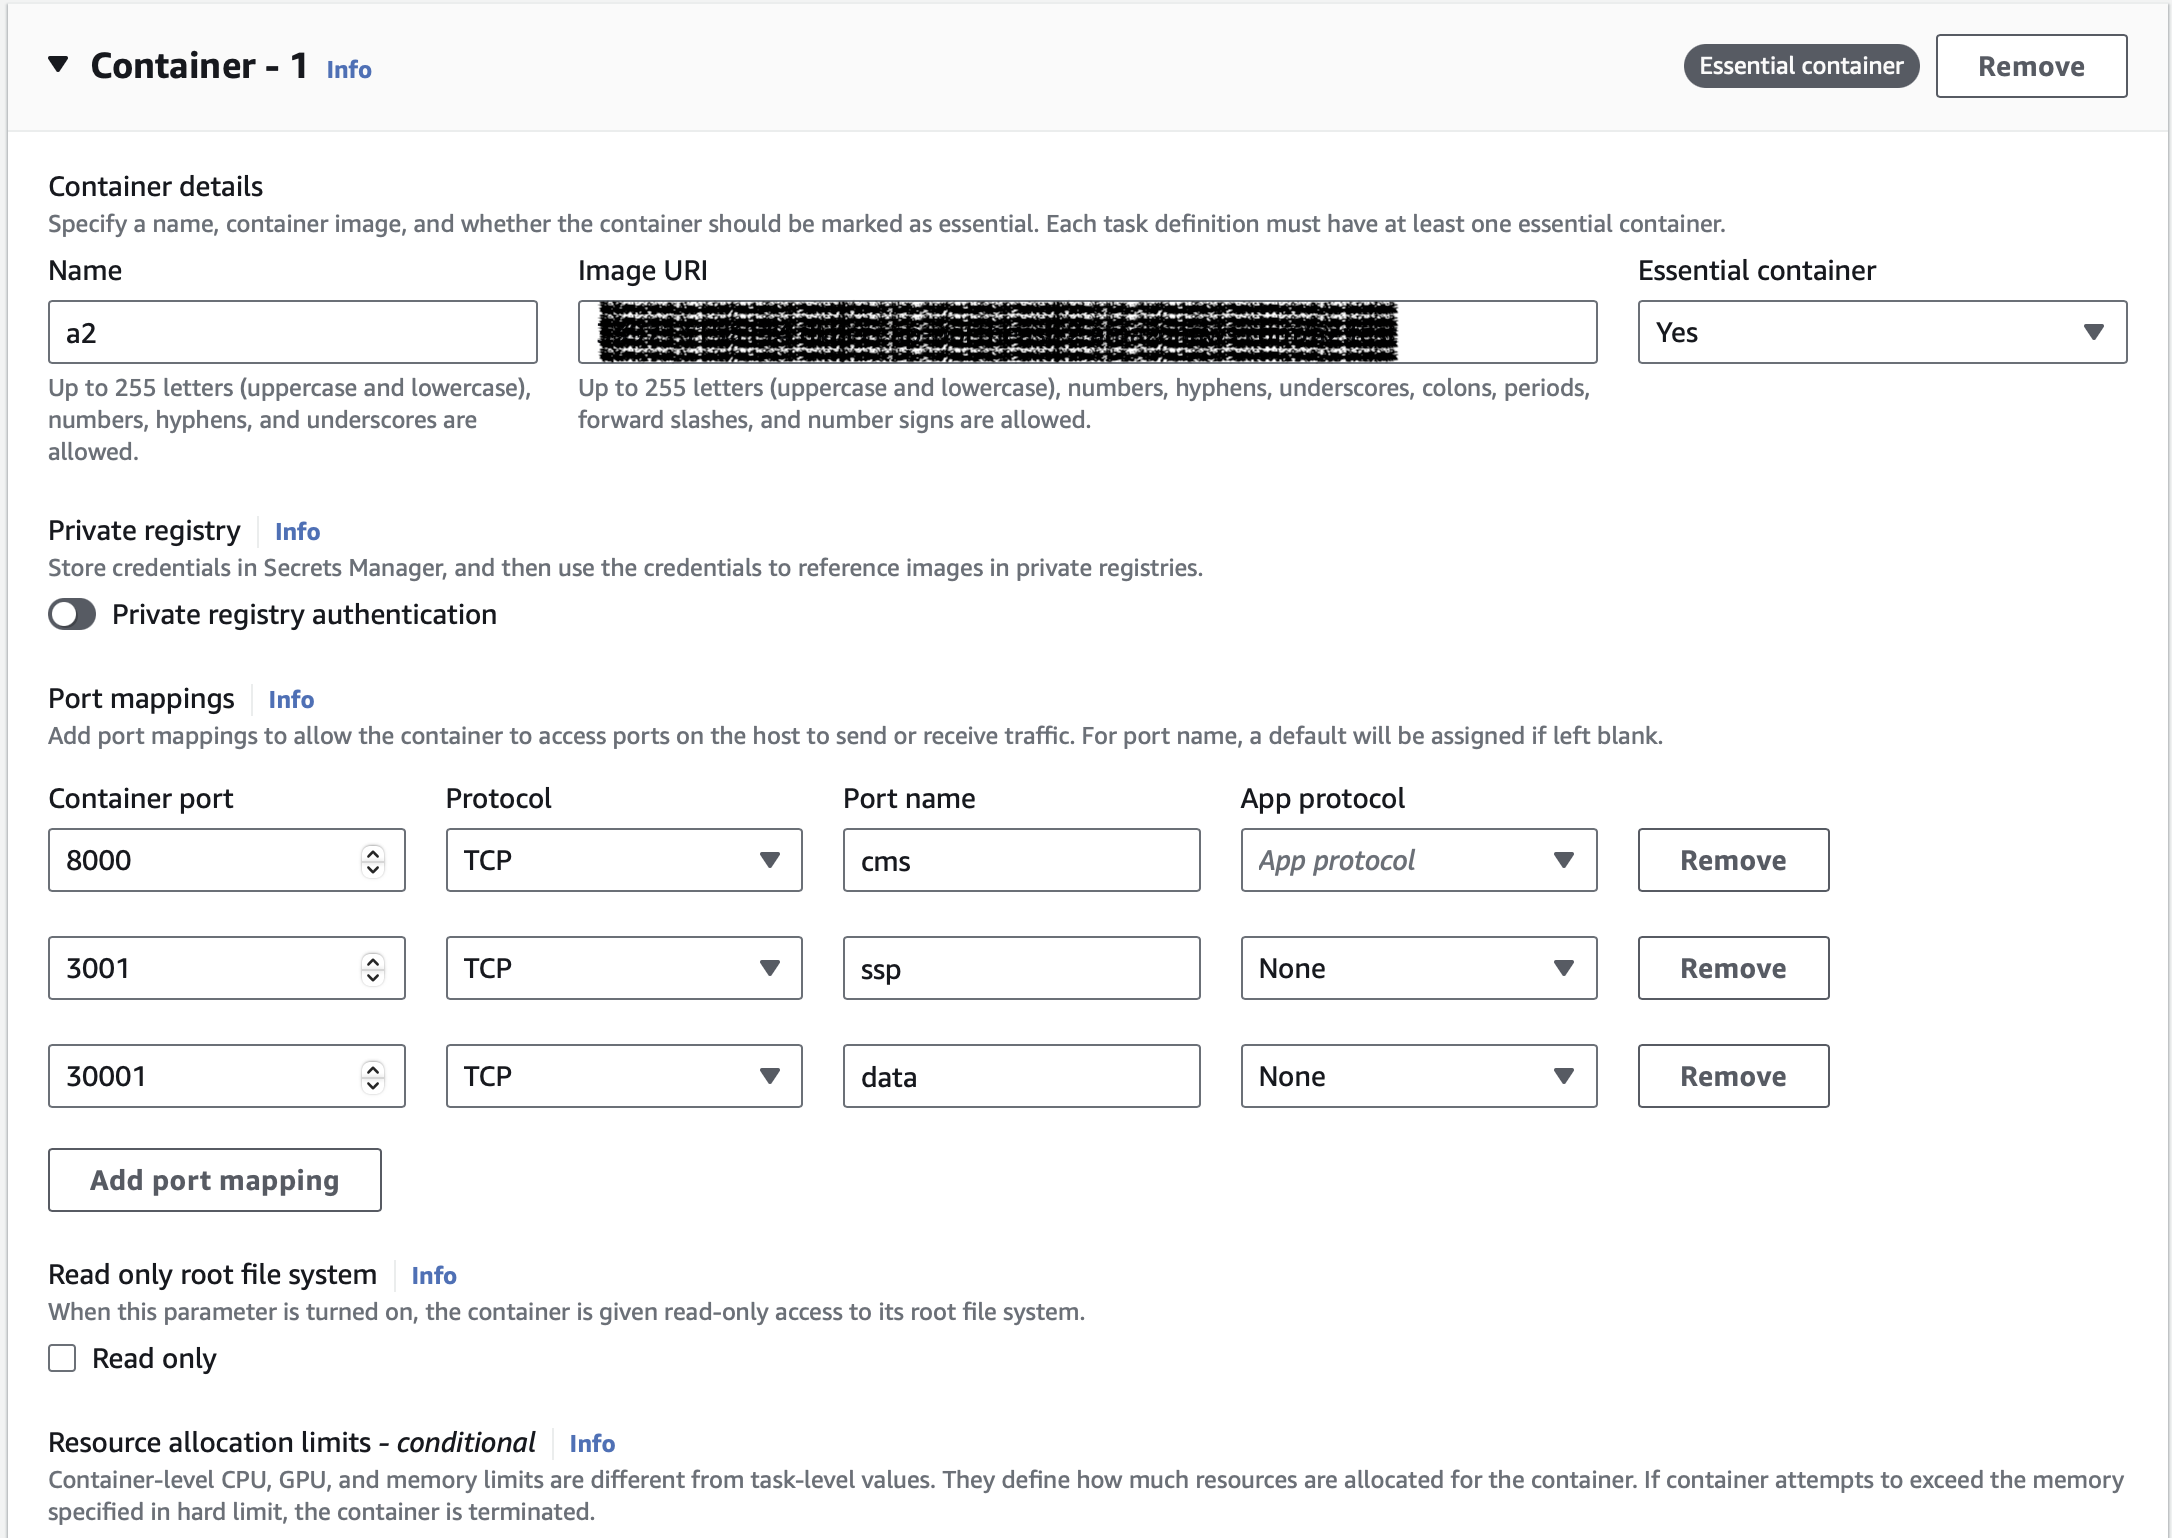
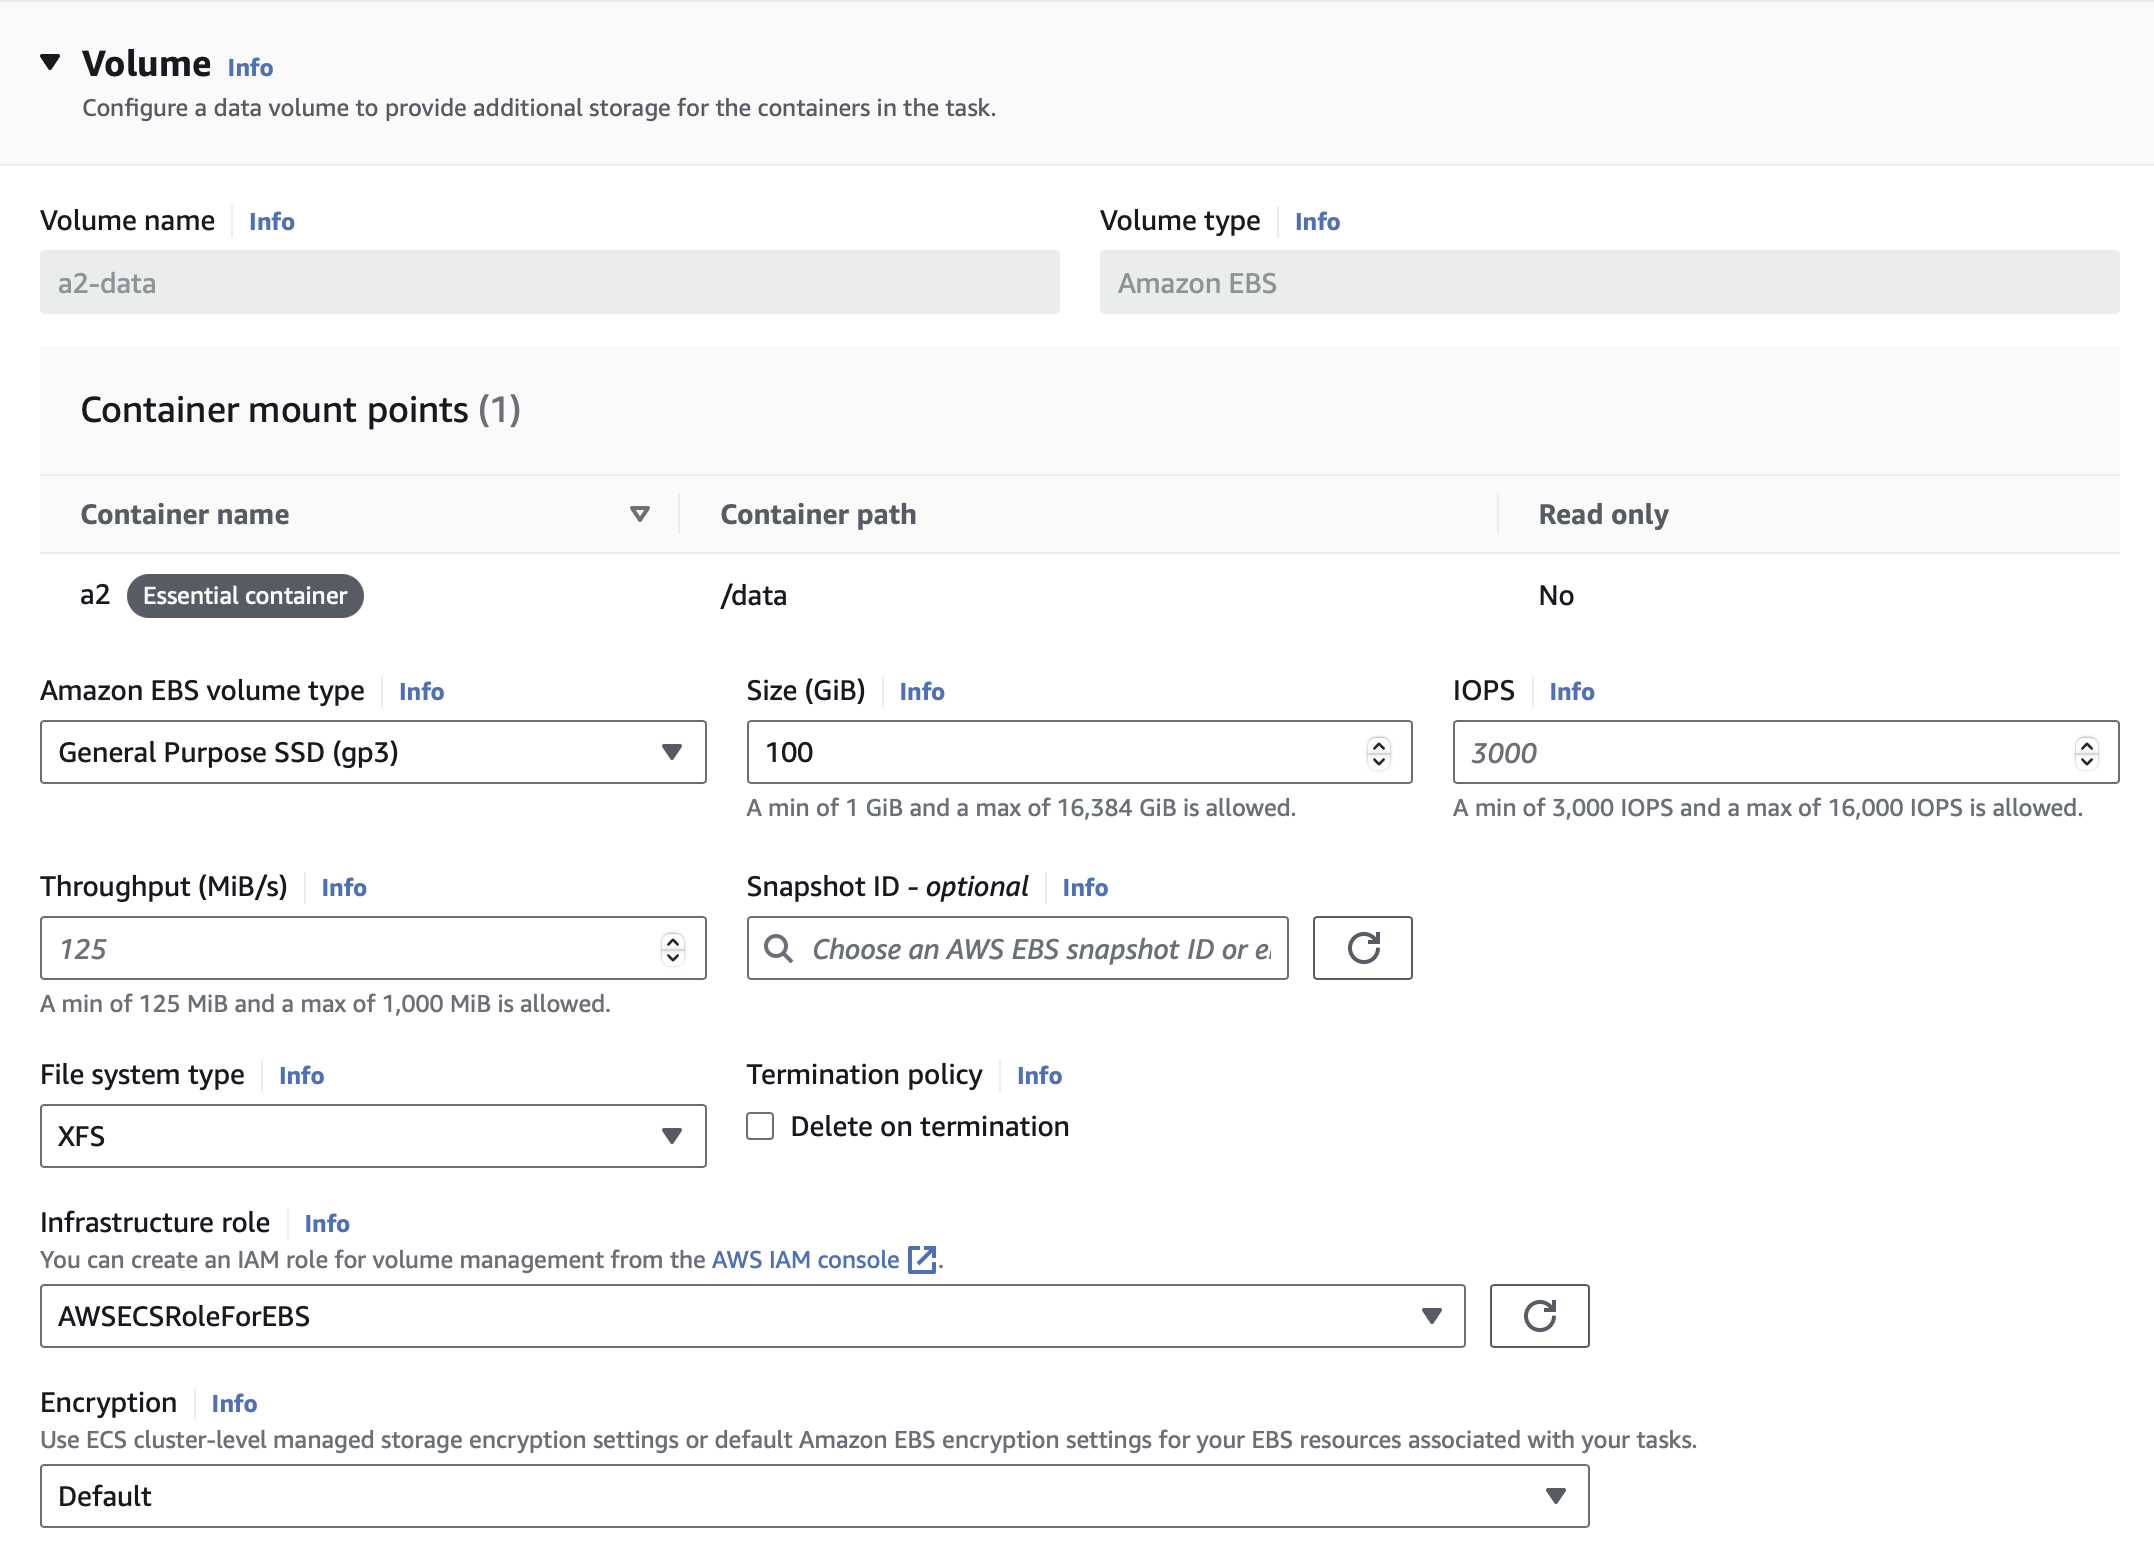
3. Deploying the Task
Deploy the task defined in step 2 to the cluster. This can be done through Clusters > Tasks > Run new task.
- Deployment Configuration
- Specify the predefined task.
- For
Application Type,Taskis recommended asServicecannot retain volumes.
- Networking
- Create a new
Security groupand defineinboundrules for each port to enable external communication with the container. - For testing, set
SourcetoAnywhere, but it is recommended to restrict it to actual IPs for security. - Enable
Public IPfor automatic IP allocation.
- Create a new
- Volume
- Specify and create the desired volume size to mount AWS EBS to the volume defined in the task.
- Uncheck
Delete on terminationto retain data.
4. Completion
After completing all settings and deployment, you can use A2 via the assigned public IP.
By following this manual, you can successfully deploy A2 on AWS. If you have any additional questions, please feel free to contact our support team.
